Creating UIs Using Xcode Storyboards
For complex UIs you can use Xcode’s Interface Builder for designing and Multi-OS Engine for generating the Java* bindings in Android Studio*. This topic demonstrates how to use this approach for building a sample Quiz App.
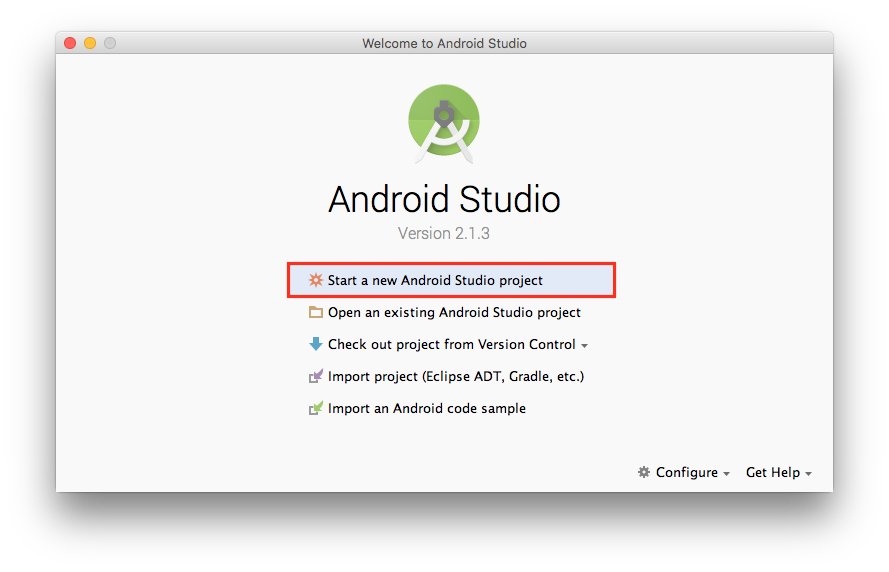
1. Create a Stock Android Application
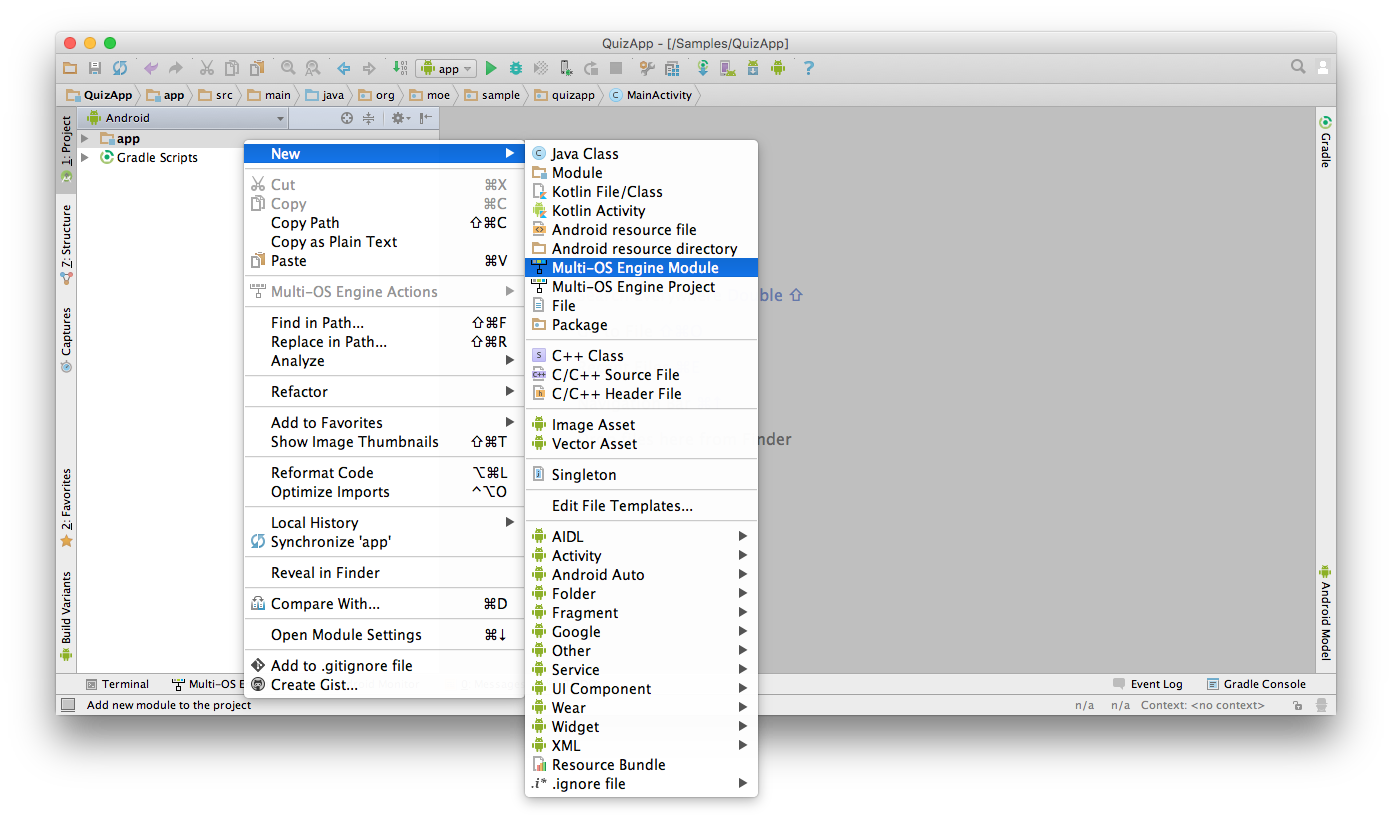
2. Create a New Multi-OS Engine Module
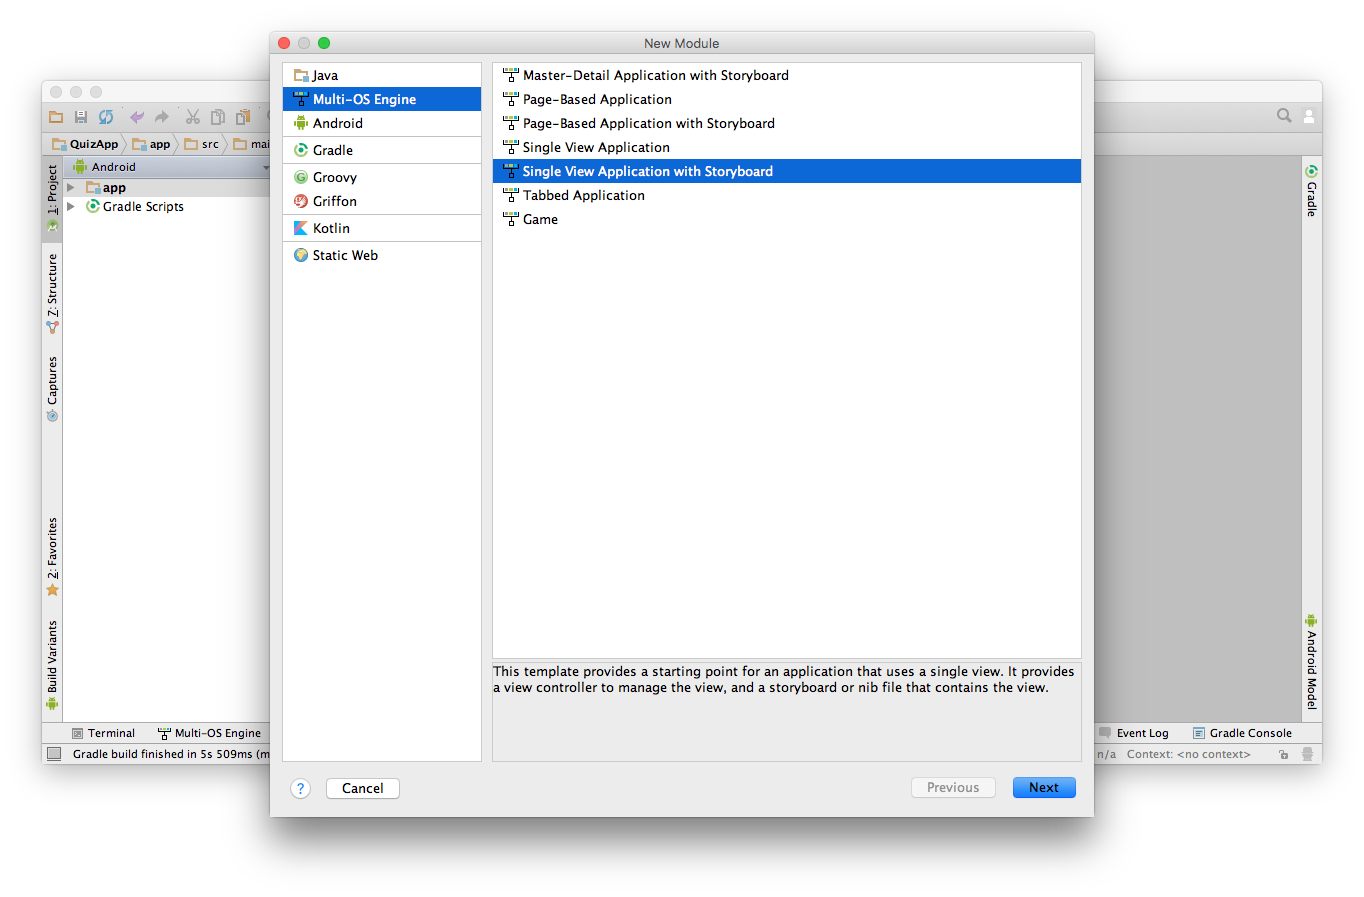
Right click on the Android project and select New > Multi-OS Engine Module to create a new iOS* module.
Select “Single View Application with Storyboard” in the “Multi-OS Engine” category.
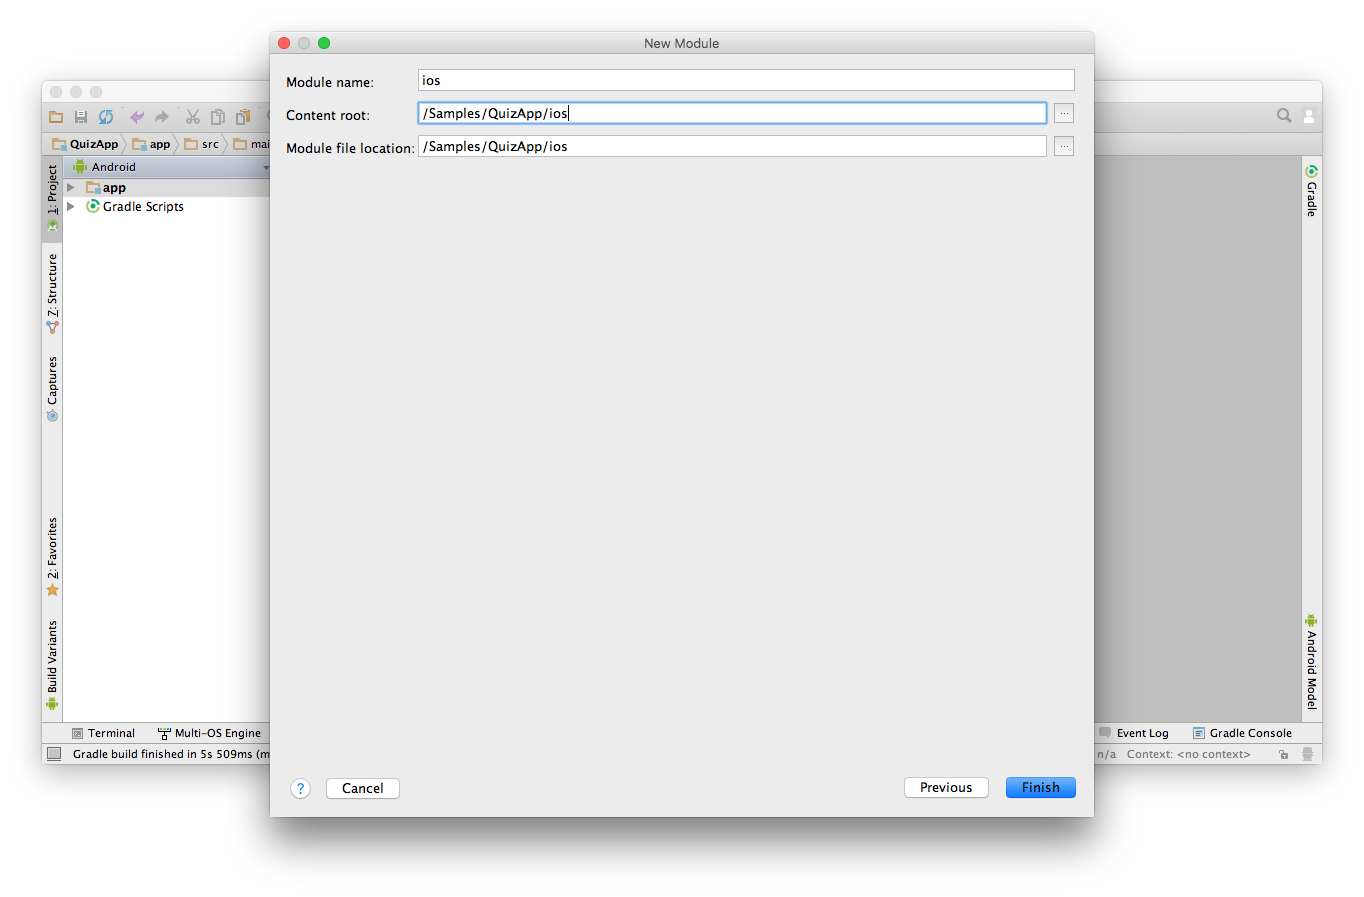
Fill out the fields and select “Keep Xcode Project”.

Change the module name and paths to use “ios”.
3. Delete Unneeded Files
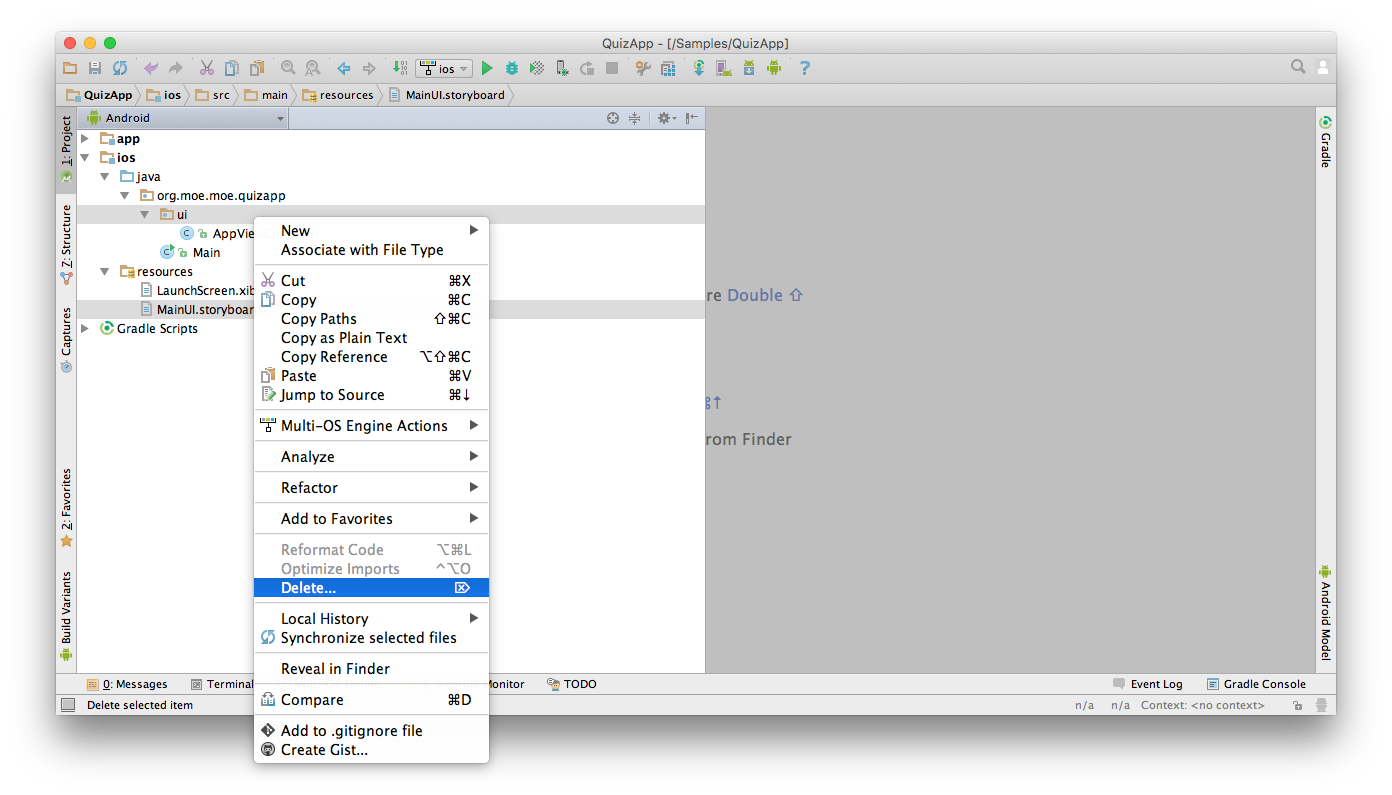
We will create the view controller and the storyboard from scratch, so let’s delete the generated ones. Select the “ui” package and “MainUI.storyboard” file and delete them.
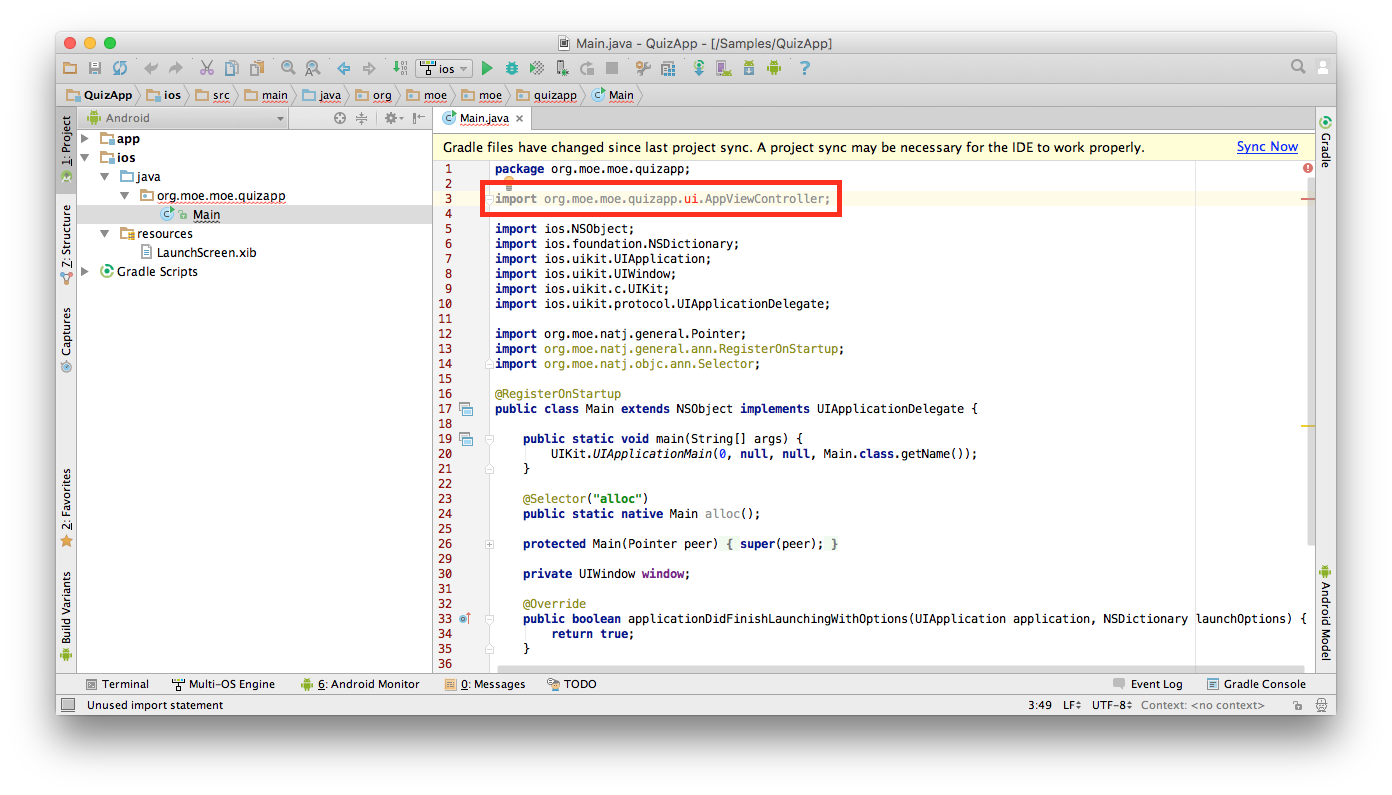
Open the “Main” class and remove the incorrect import of AppViewController.
4. Edit the Xcode Project
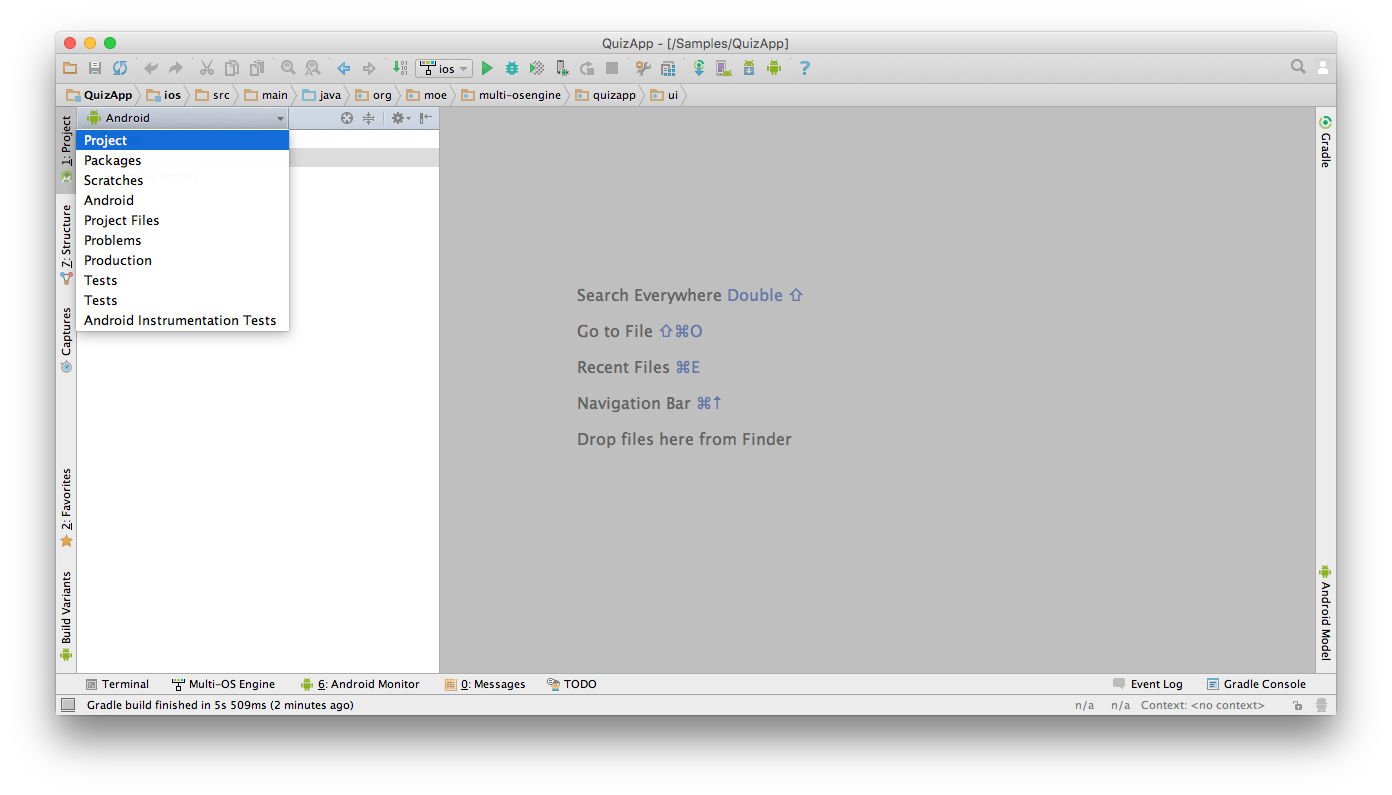
Change your view to “Project” in Android Studio.
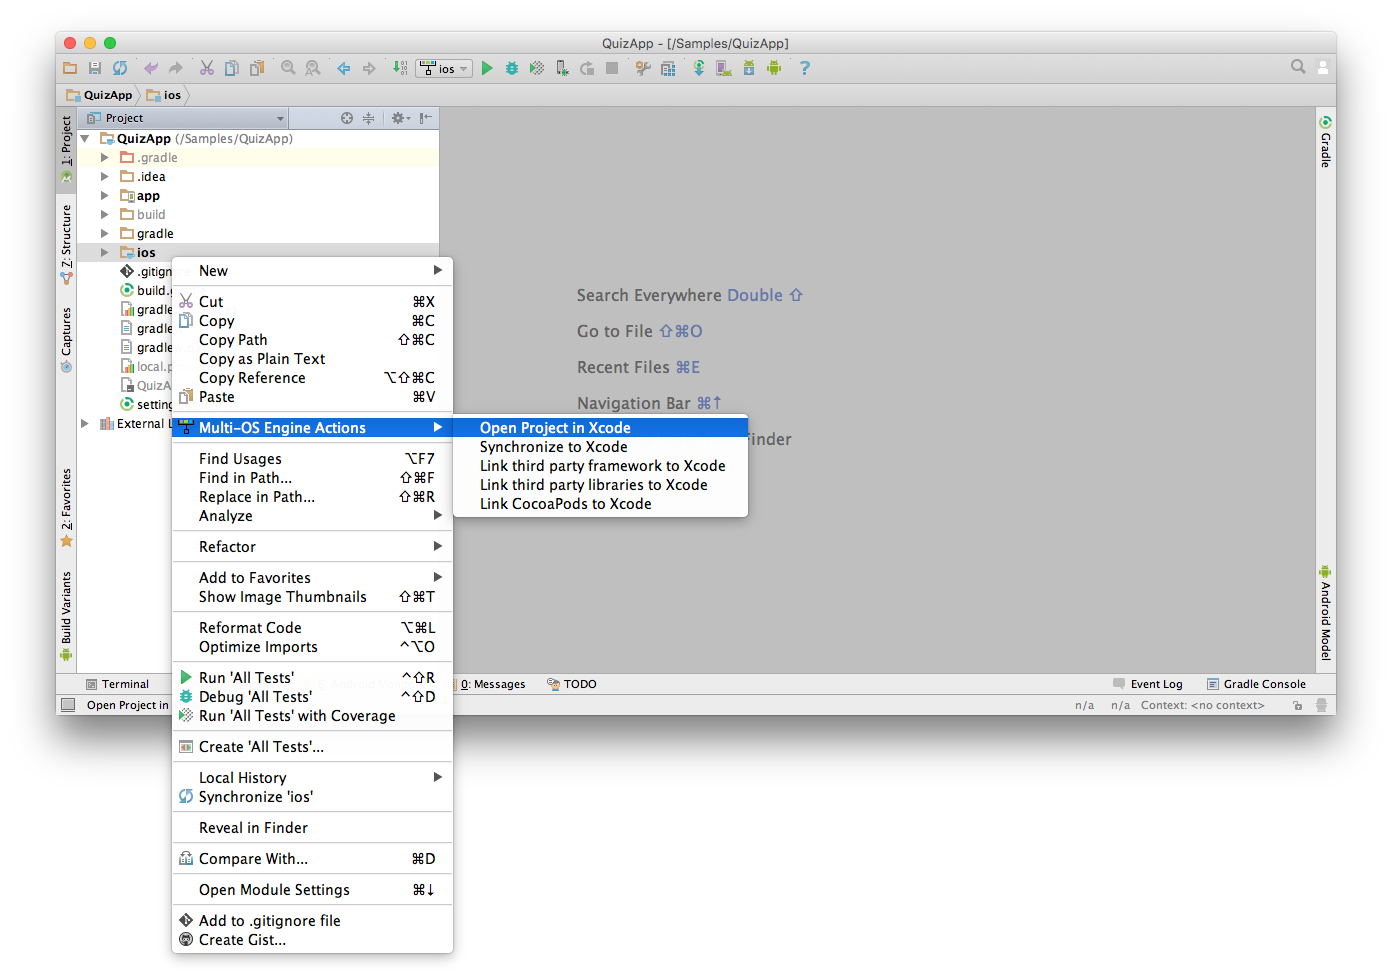
Right-click on the “ios” module and select “Multi-OS Engine Actions” > “Open Project in Xcode”.
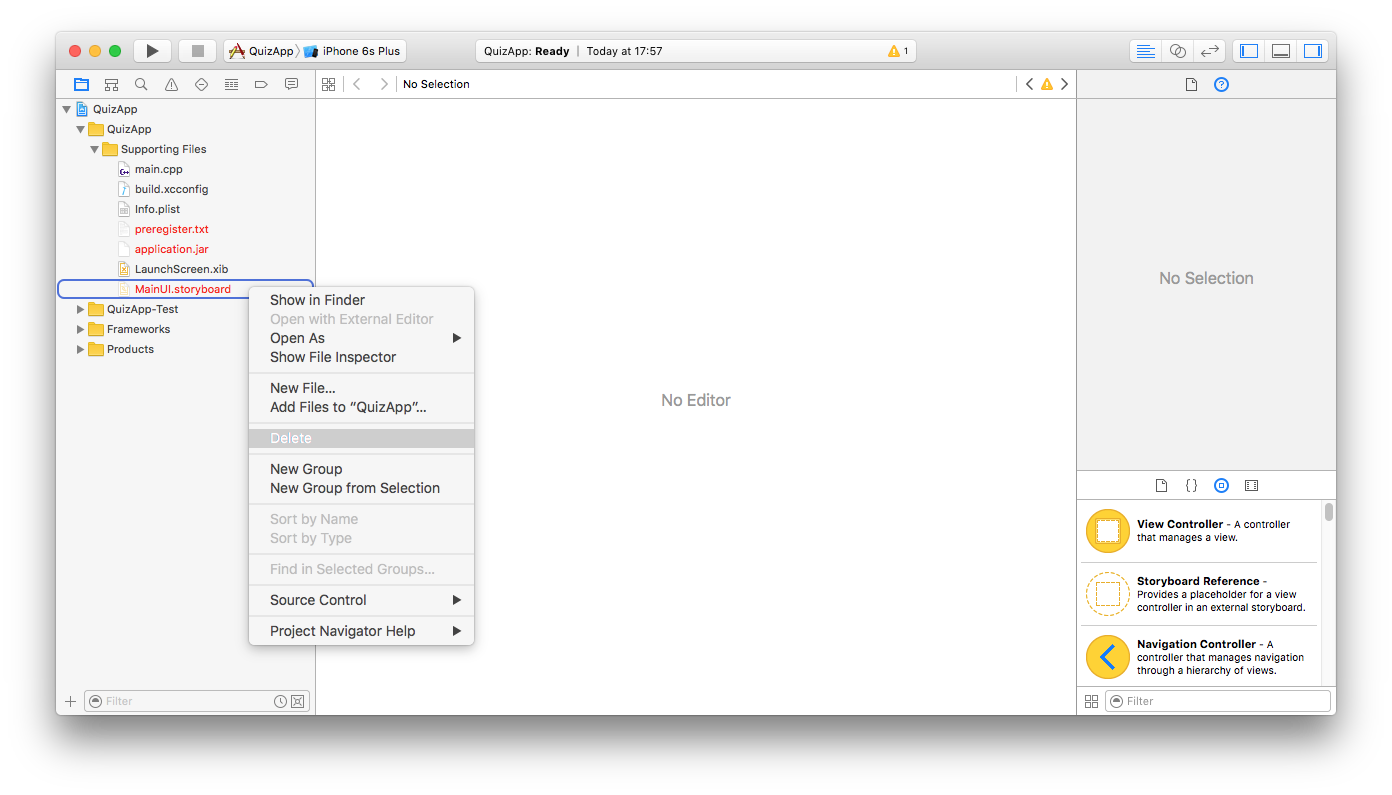
Delete the remaining reference to the removed “MainUI.storyboard” file in Xcode.
5. Create the View Controller and Storyboard
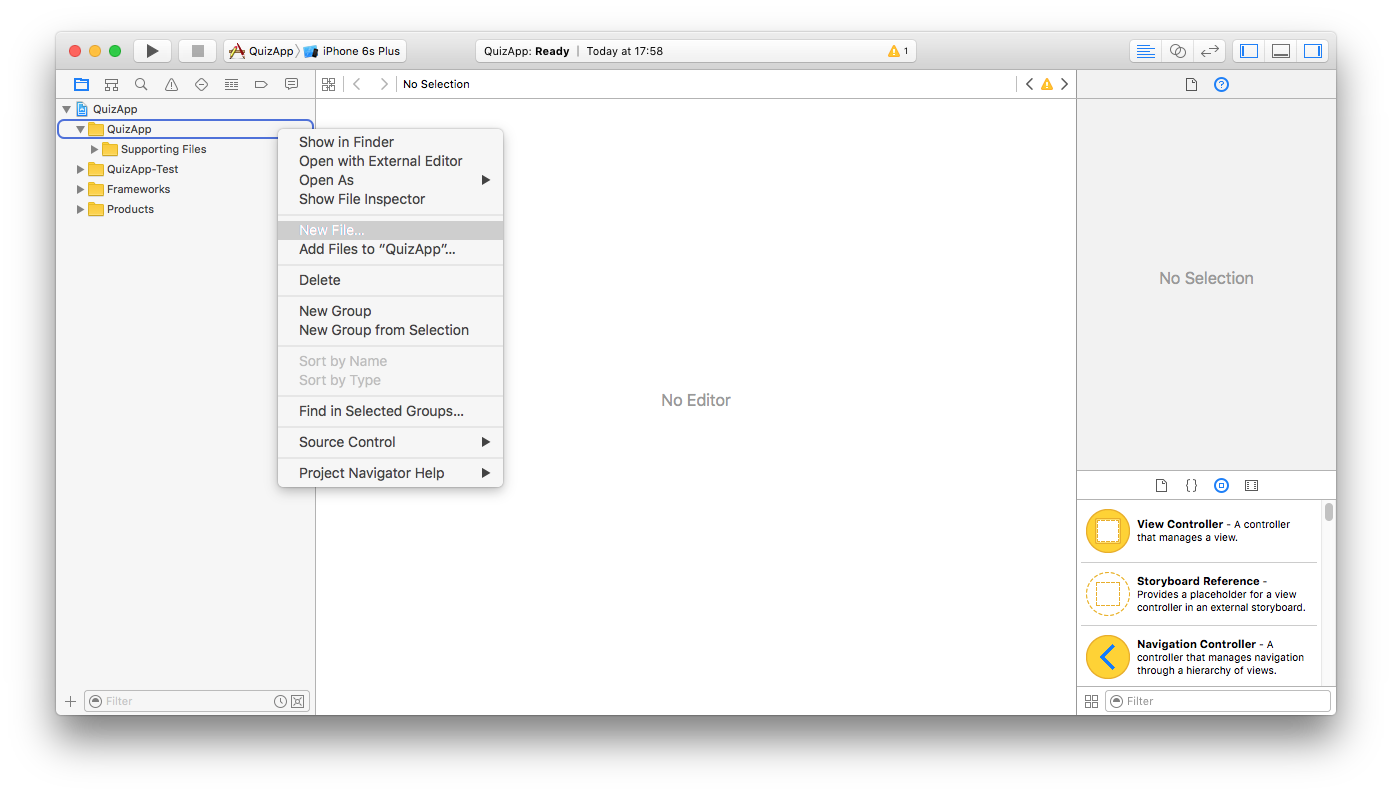
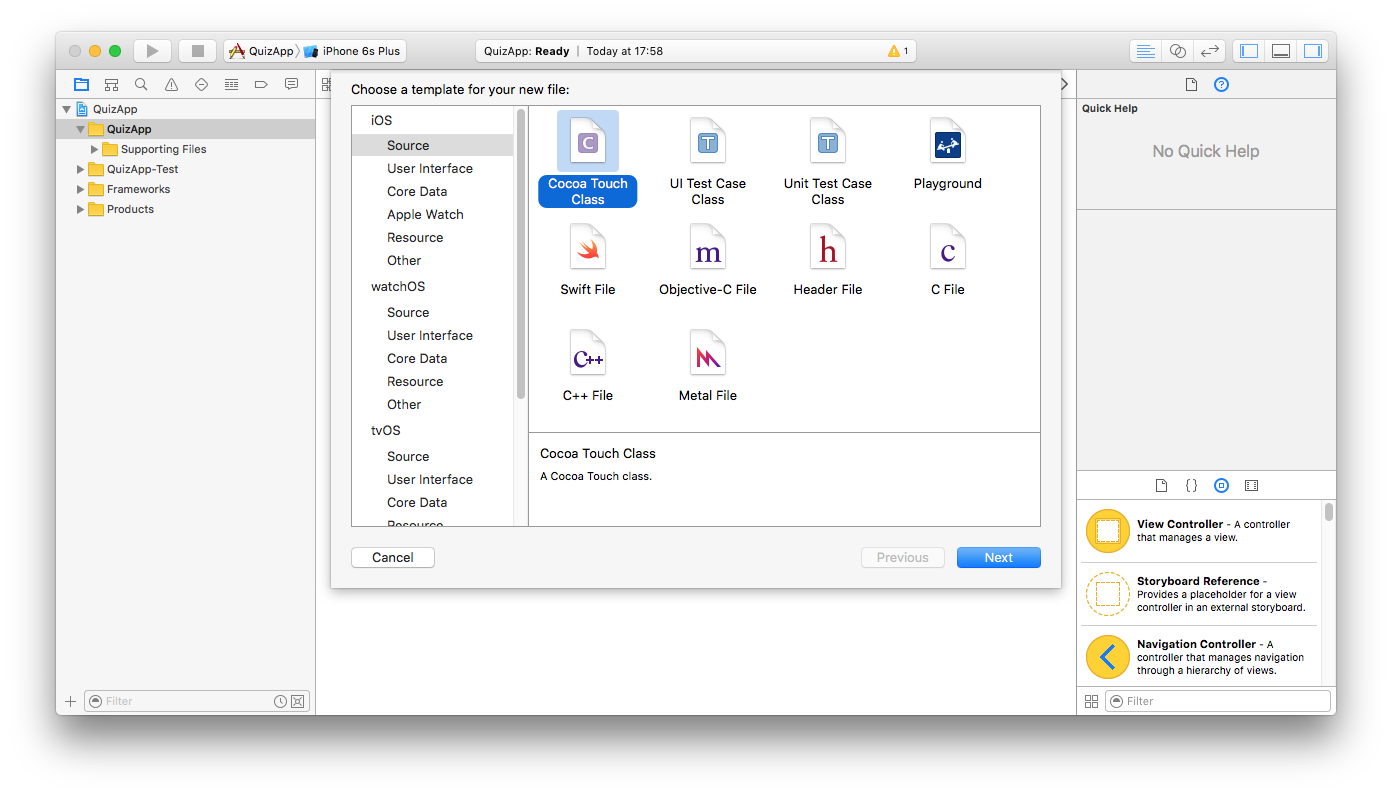
Right-click on the “QuizApp” group and select “New File…”.
Select “Cocoa Touch Class” in the “iOS” > “Source” category.
Rename the class to “MyViewController” and make it a subclass of “UIViewController”.

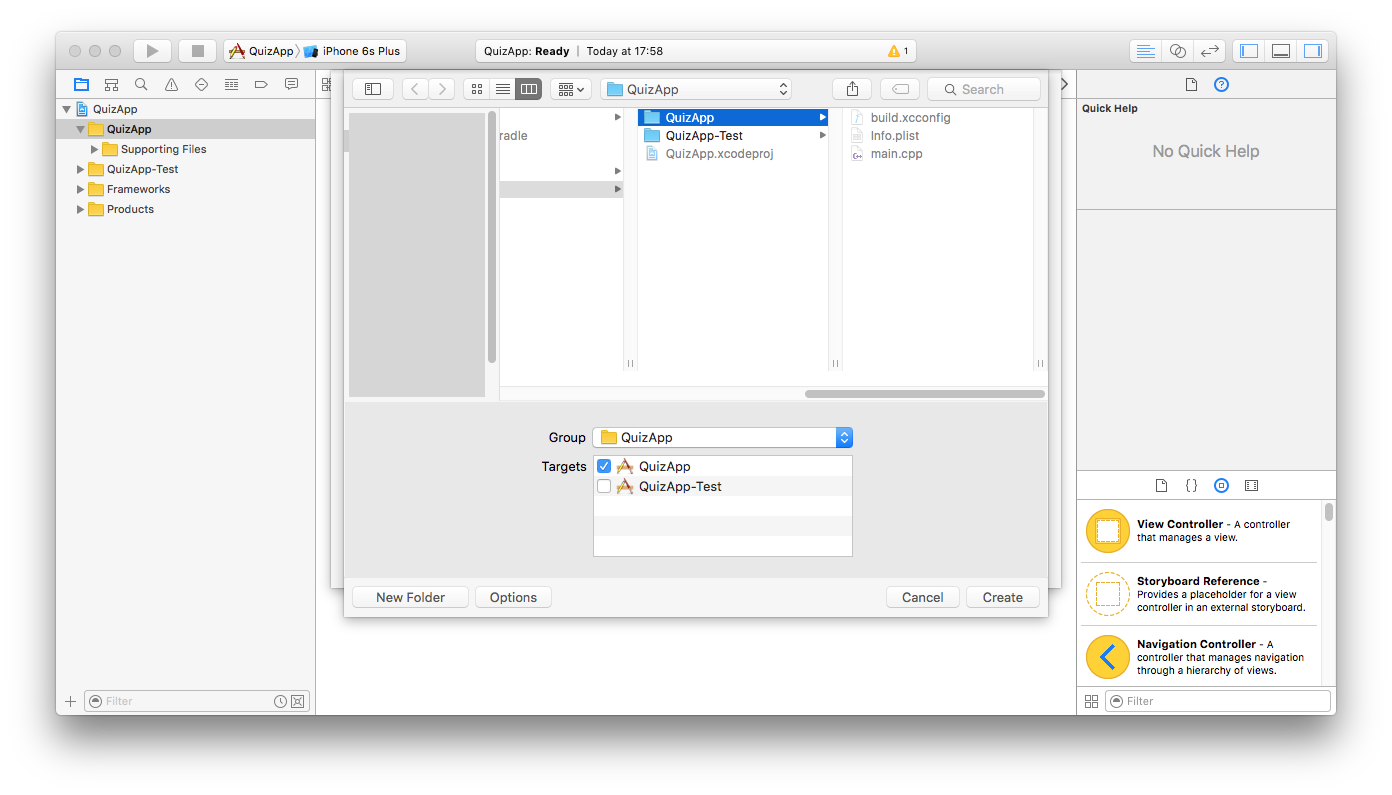
Save in the Xcode target’s (QuizApp) directory. (This should be the default save location)
Create another new file, but now a “Storyboard” from the “iOS” > “User Interface” category.

Save it as “Storyboard” to the same location.

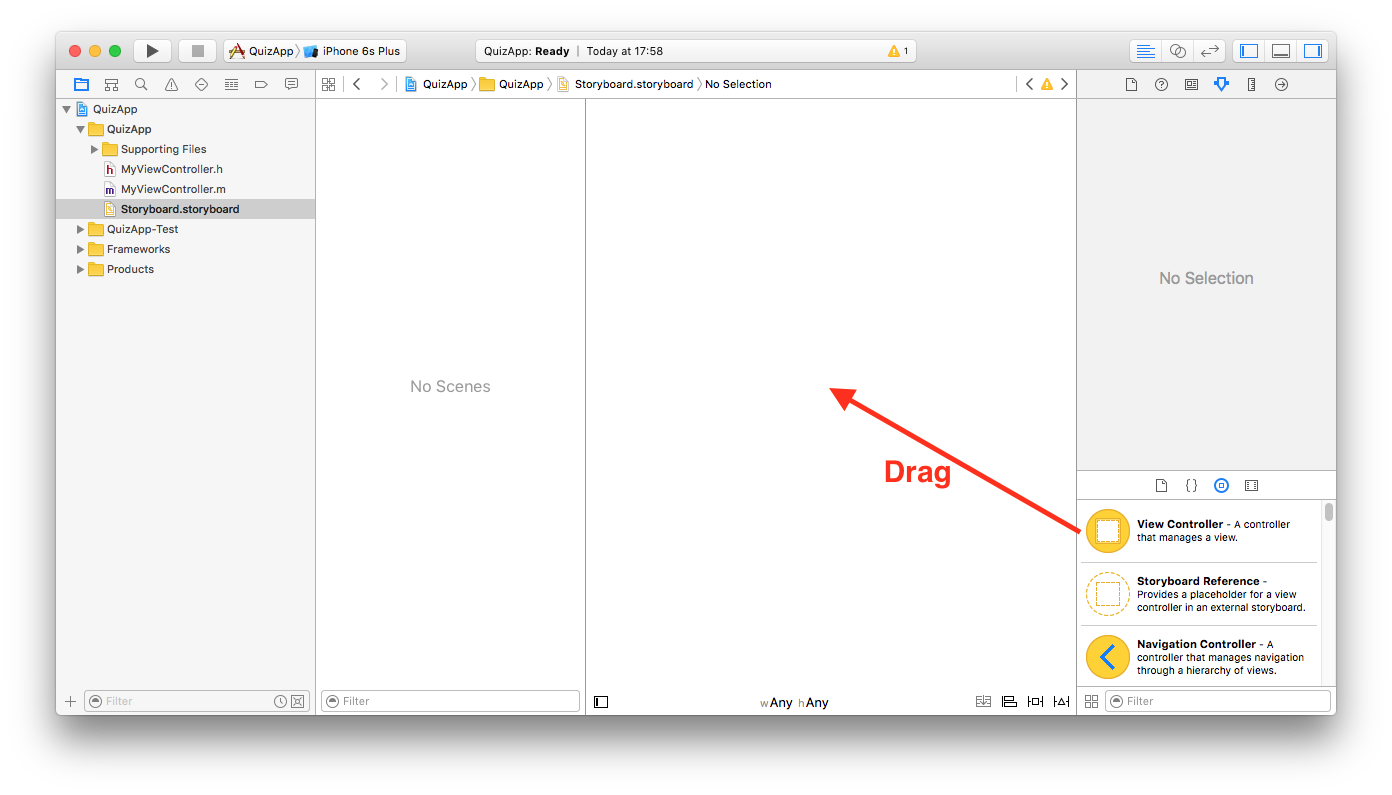
6. Edit the Storyboard
Open up the Storyboard file for editing and drag a “View Controller” into the big empty editor area.
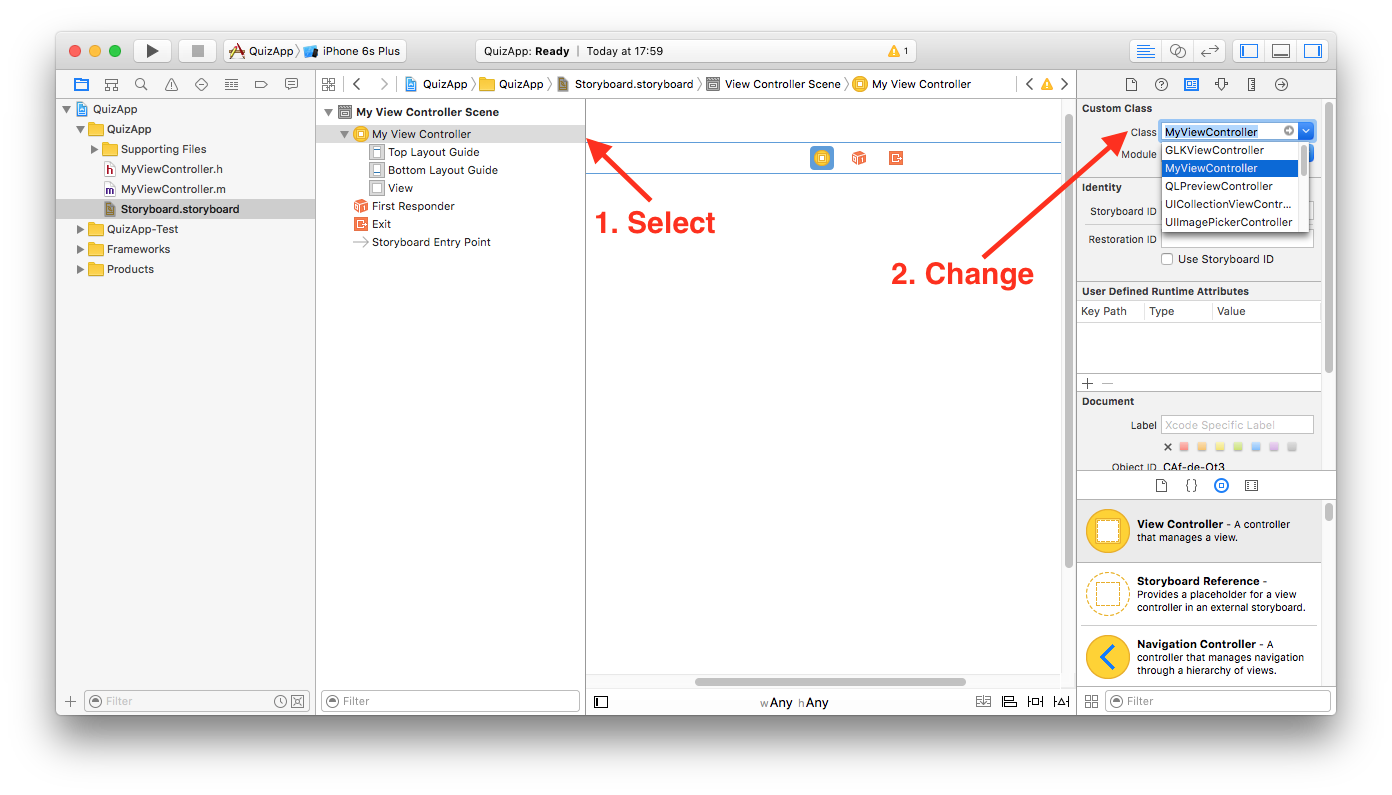
In the Attributes inspector check in the “Is Initial View Controller” checkbox.

In the Identity inspector change the view controller’s class to MyViewController.
7. Add UI Elements
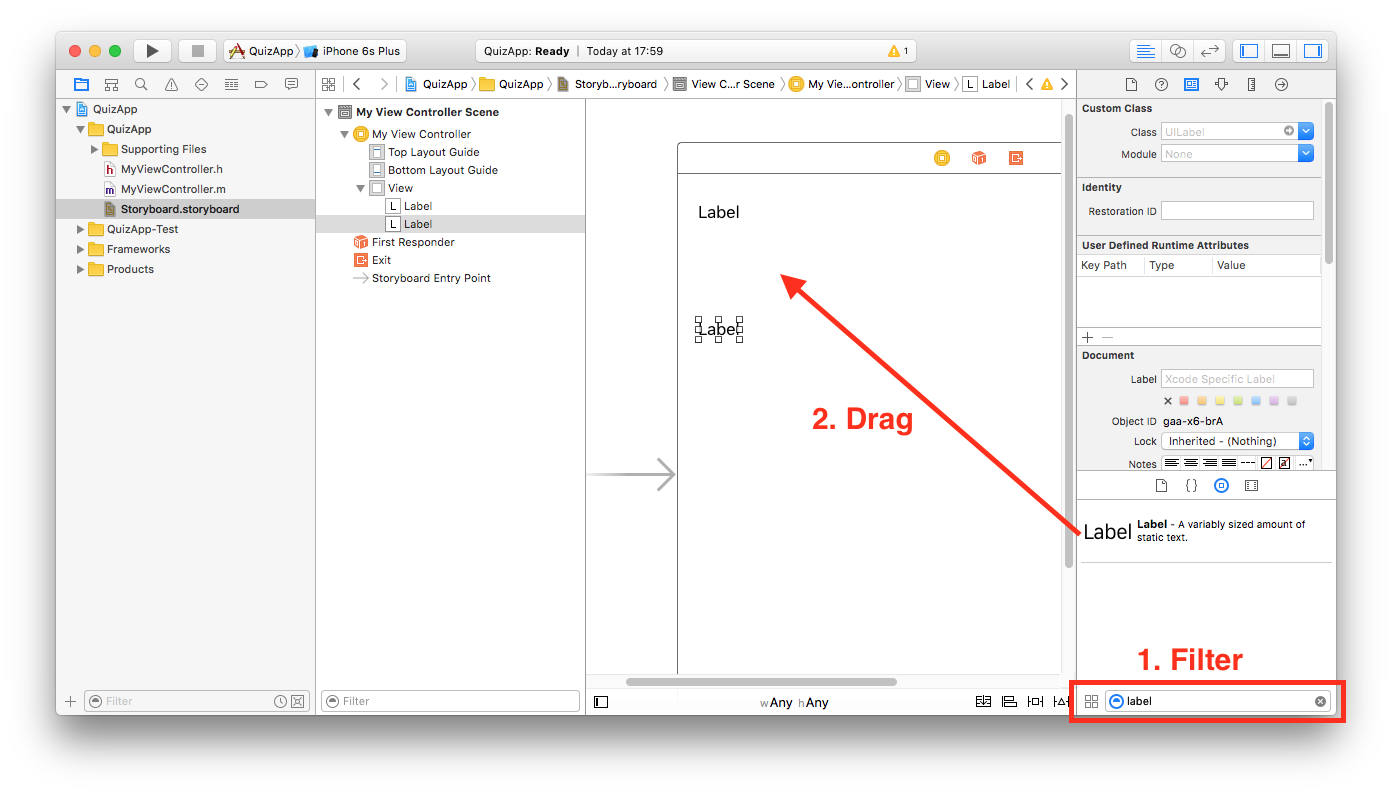
Add two labels by searching for “label” and dragging them onto the view controller’s view.
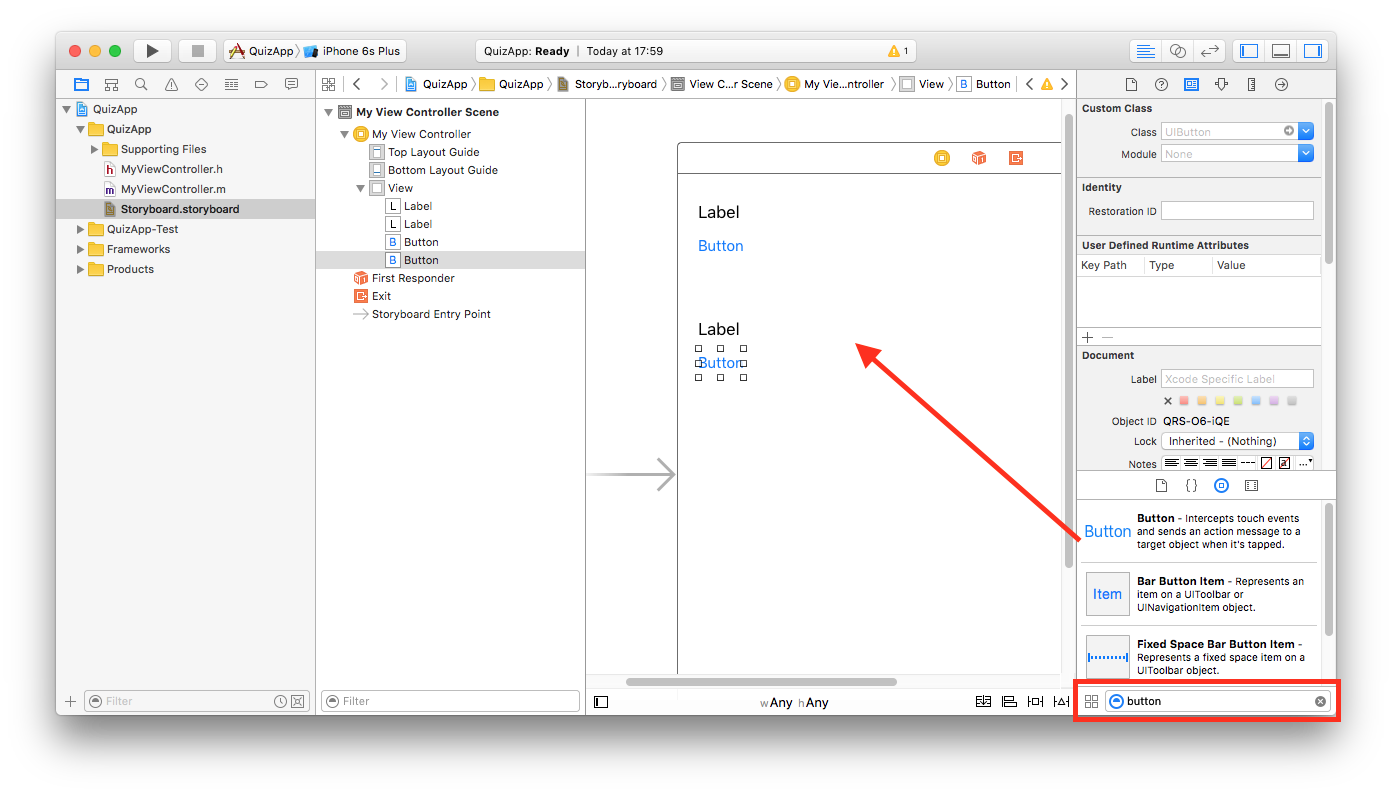
Do the same for adding two buttons.
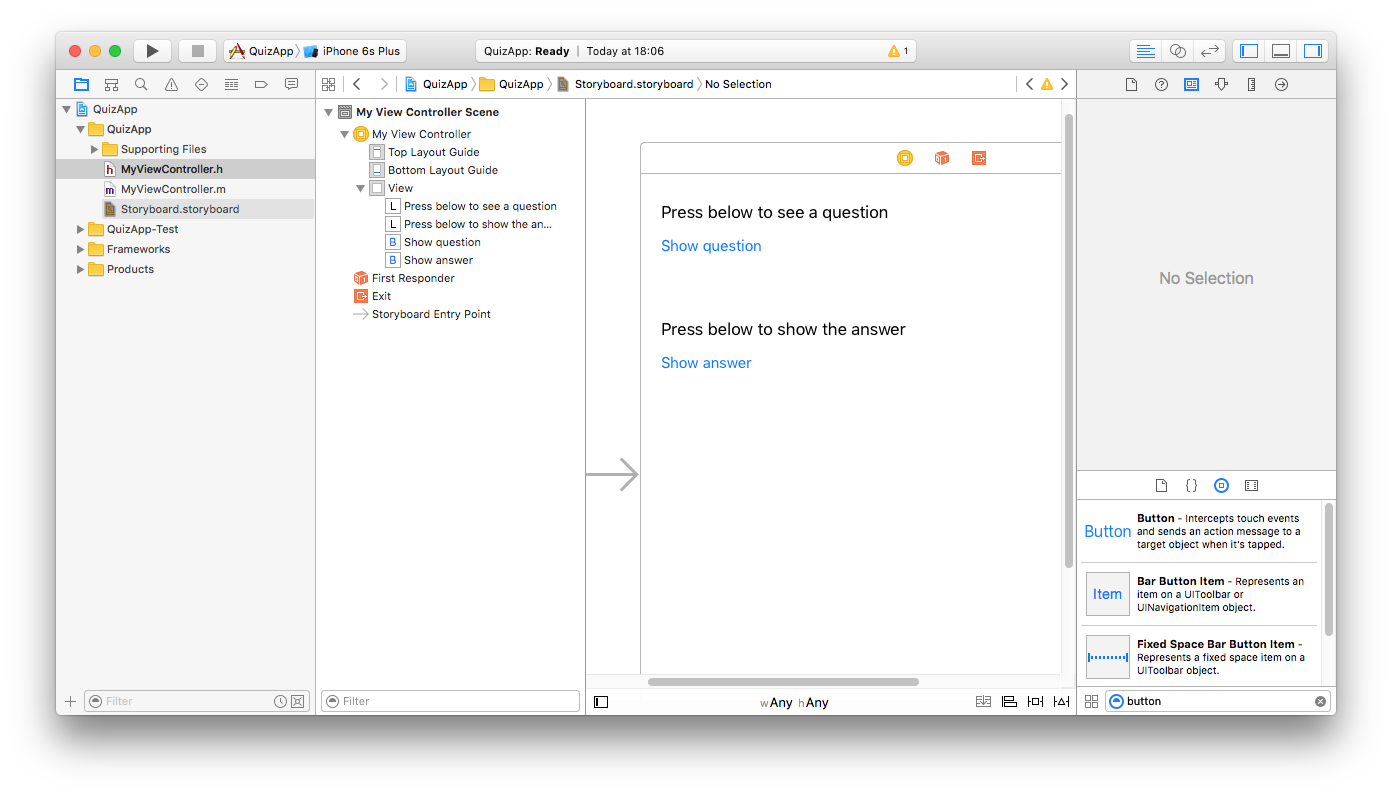
Edit the controls’ text by double-clicking on them and rearrange them by dragging them to their final location.
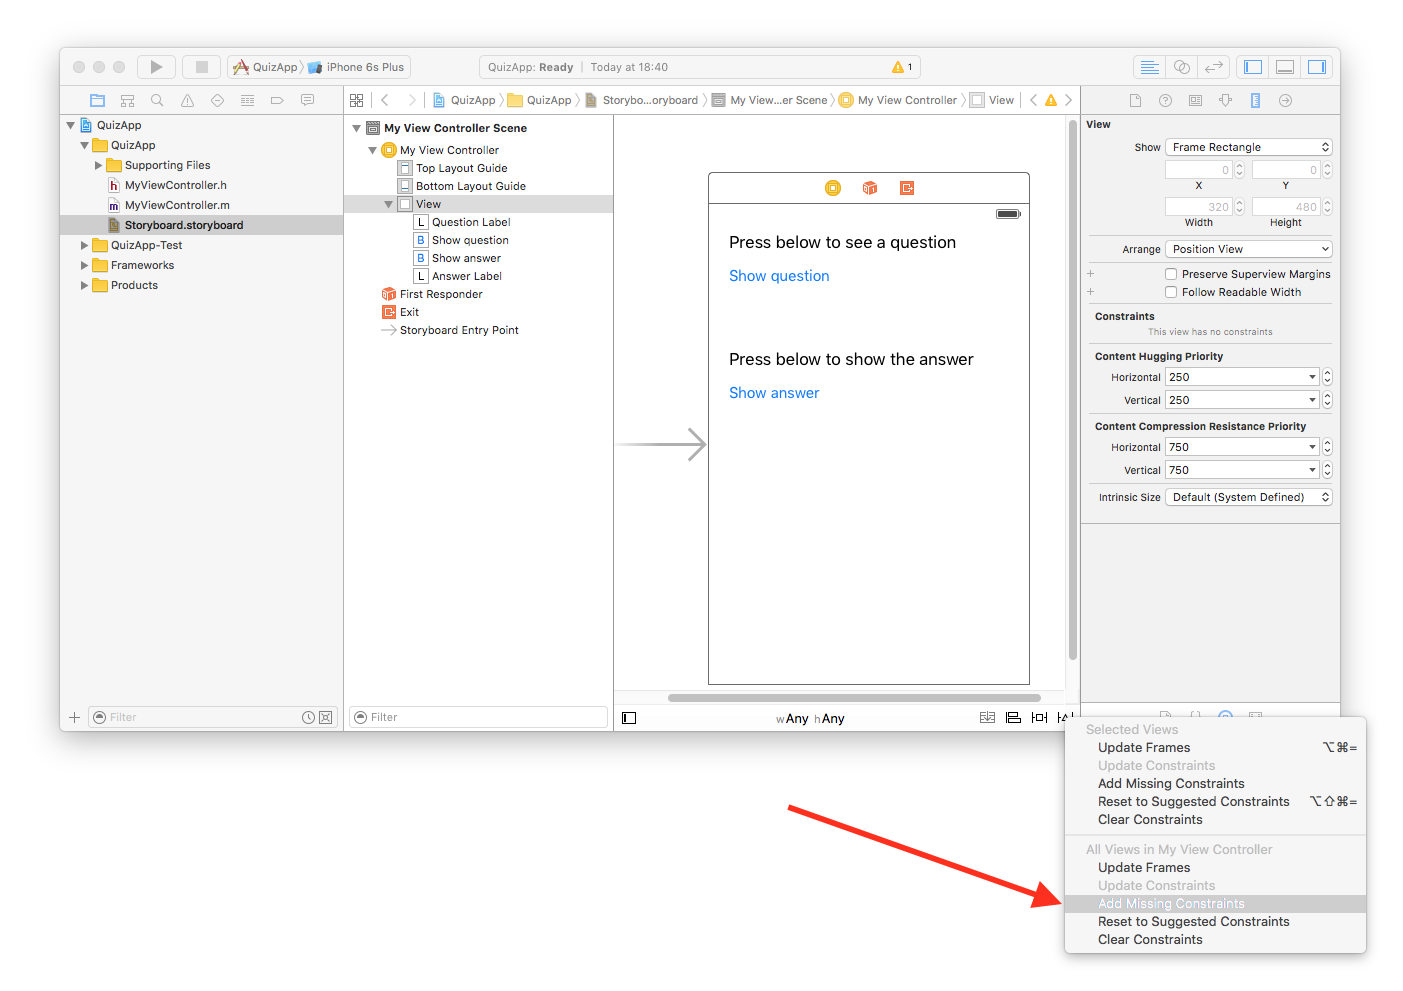
Select the view controller’s view and in the “Resolve Auto Layout Issues” menu select “Add Missing Constraints”.
8. Binding the UI Elements to the Controller
Open up “MyViewController.h” in the Assistant Editor and ctrl + Drag the controls from the storyboard editor into the MyViewController’s source code.
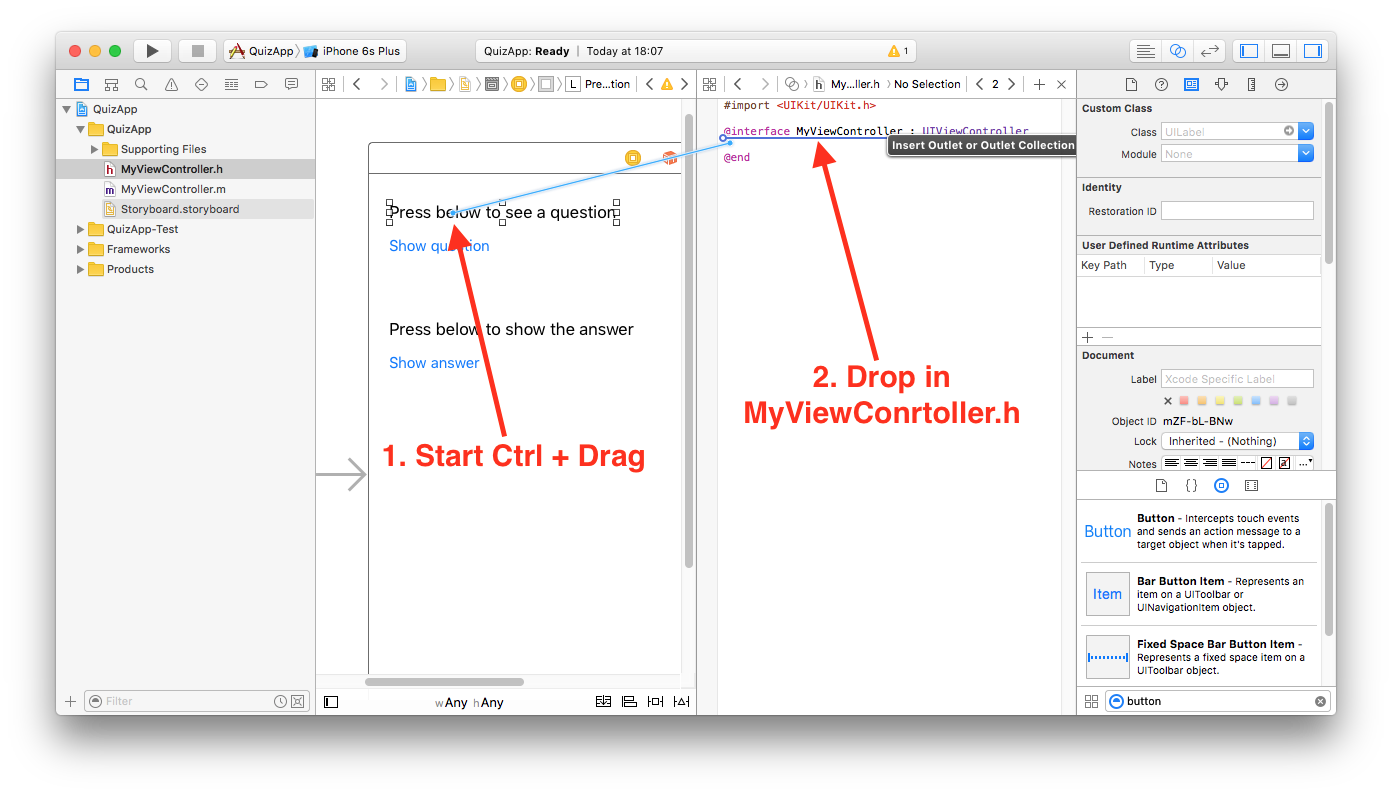
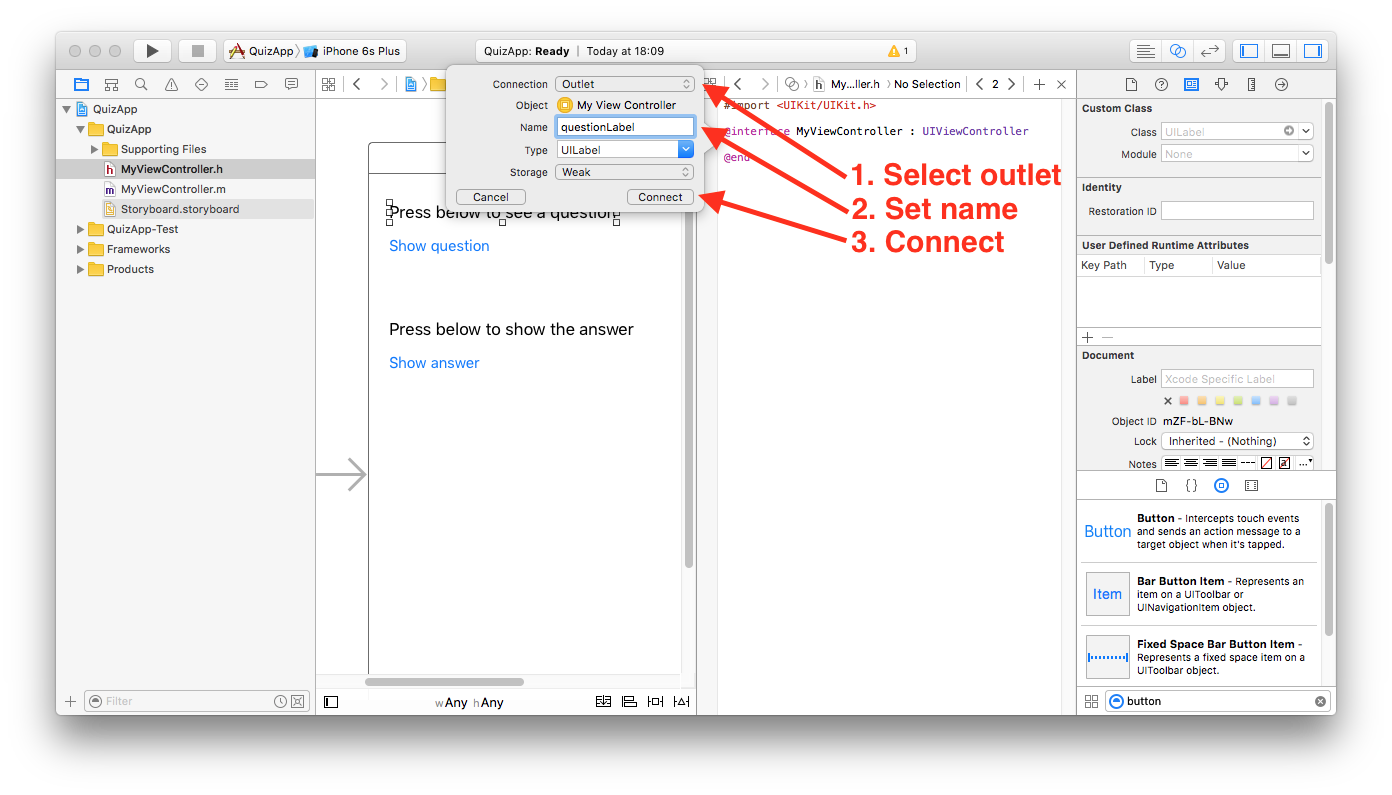
Add outlets for the labels, one as questionLabel, the other as answerLabel.
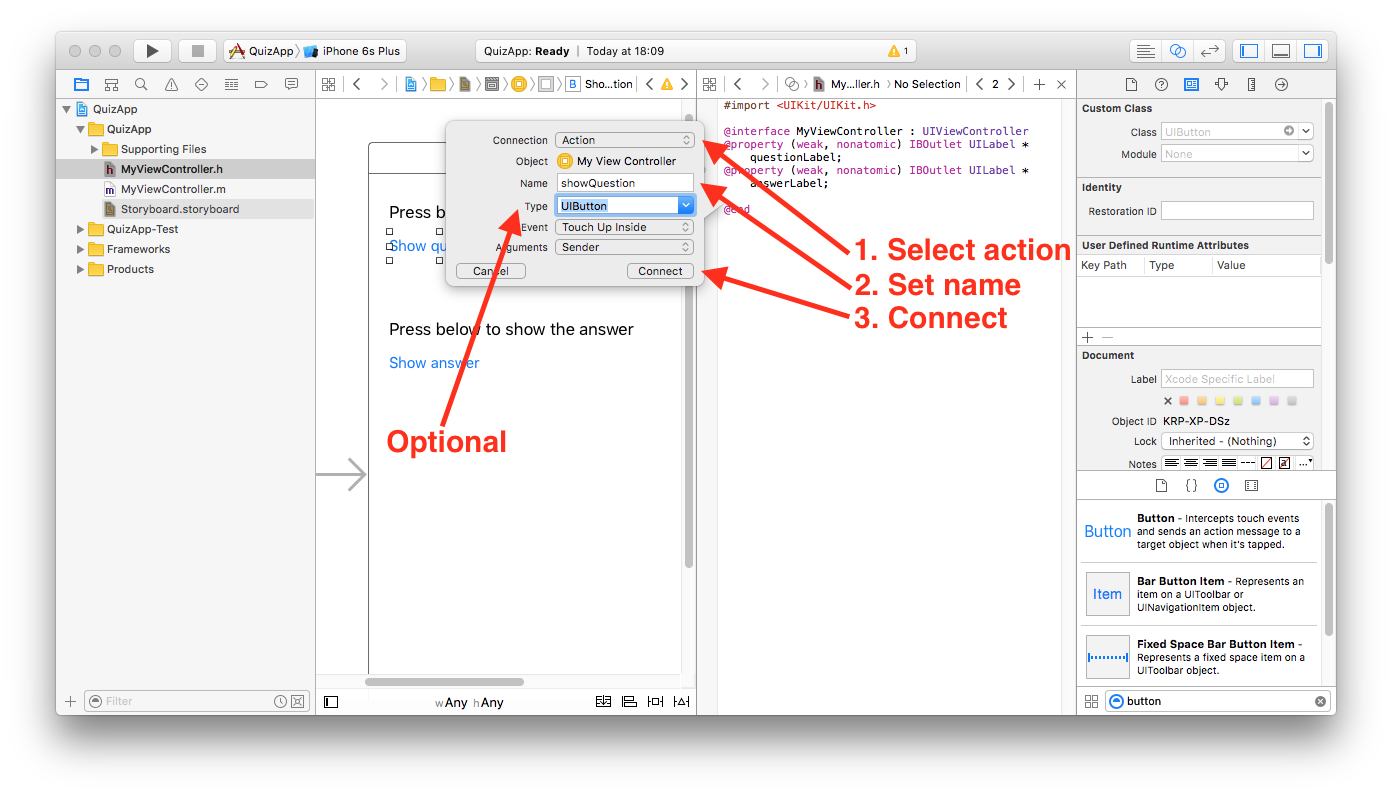
Add actions for the buttons, one as showQuestion, the other as showAnswer.
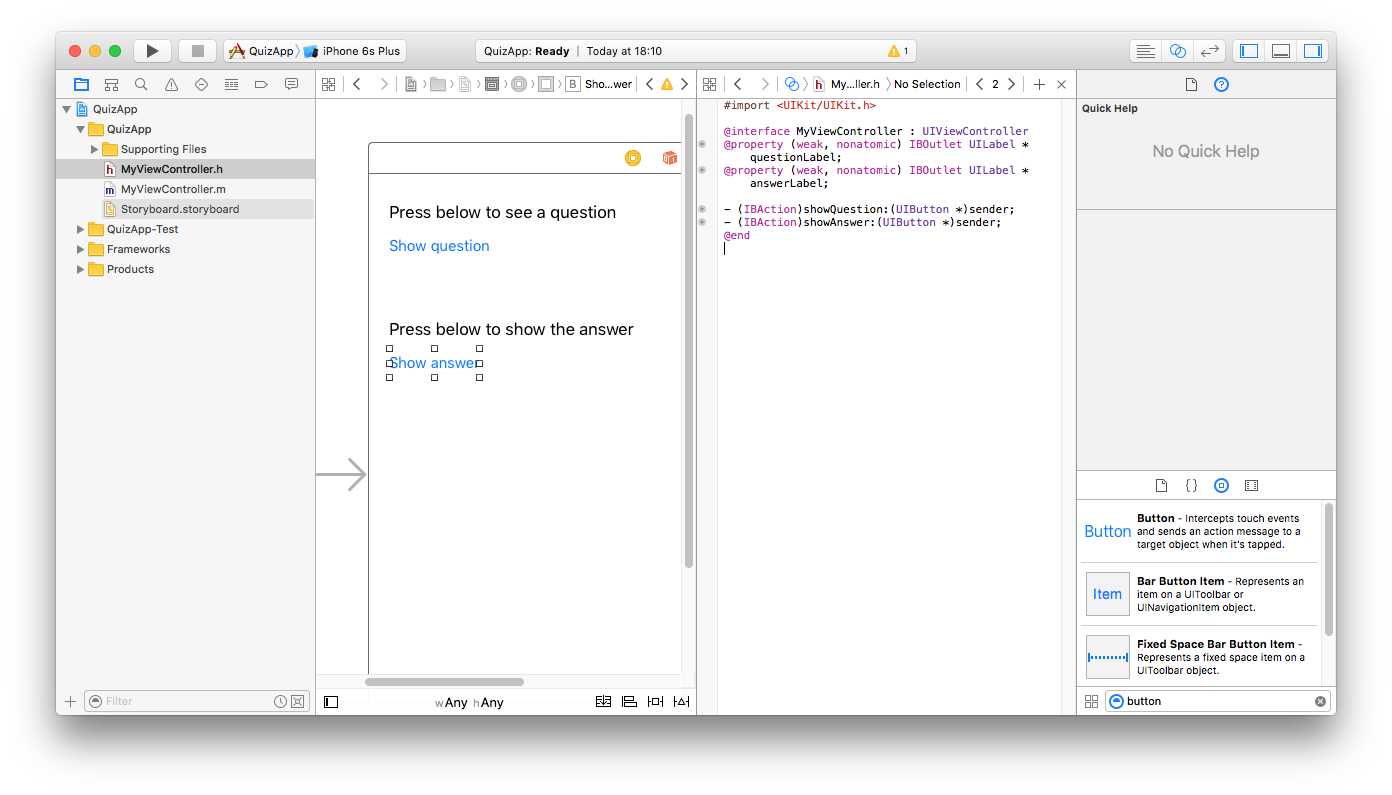
The result should look like this.
9. Edit the Target
Select the “QuizApp” project in the Project navigator and “QuizApp” in the Targets listing. In the “General” tab set the Version, Build and Main Interface fields.

10. Editing the Java Code
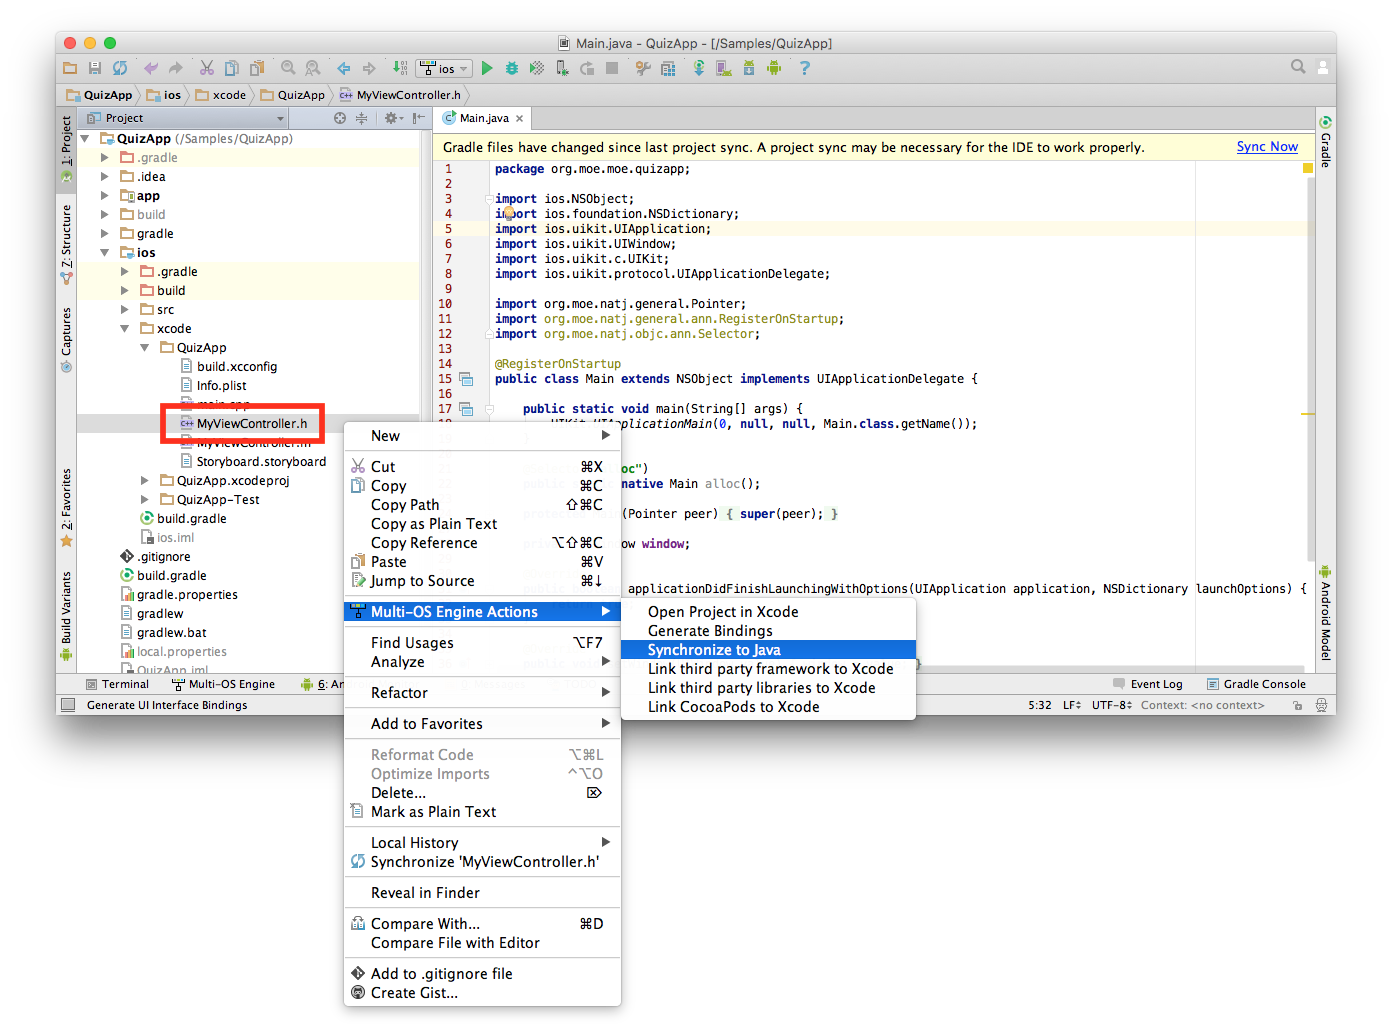
Go back to Android Studio, select your MyViewController.h, right-click on it and select “Multi-OS Engine Actions” > “Synchronize to Java”.
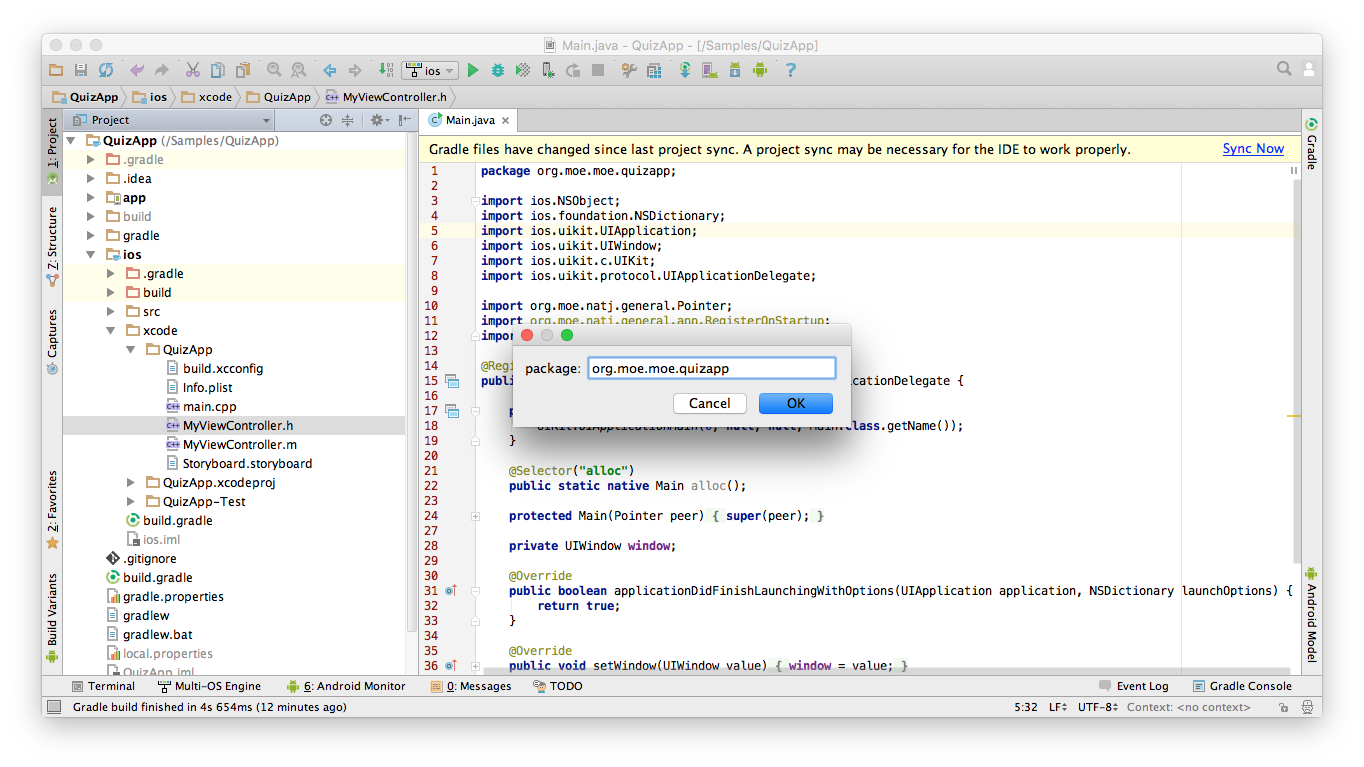
It will ask for a package to generate the bindings into.
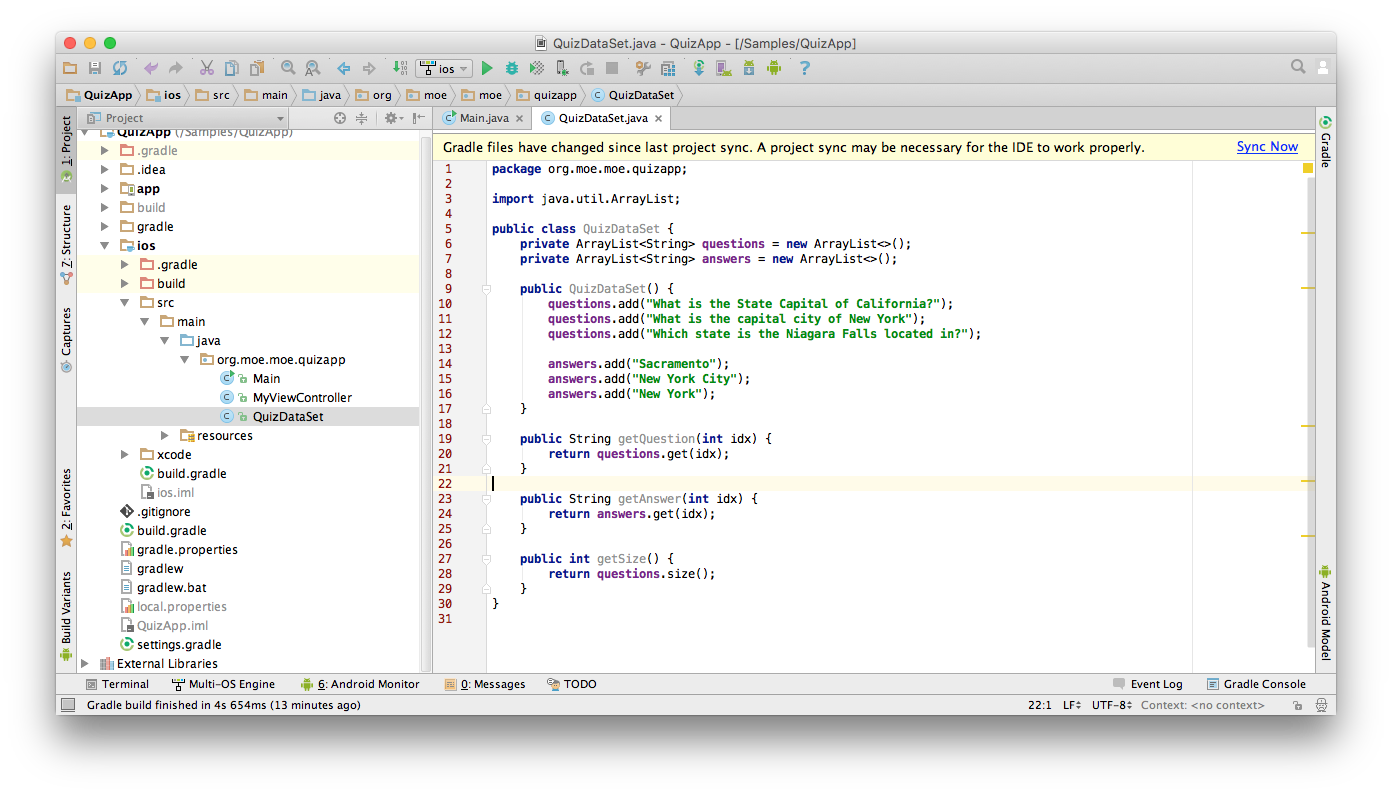
Add a new Java class called QuizDataSet.
public class QuizDataSet {
        private ArrayList<String> questions = new ArrayList<>();
        private ArrayList<String> answers = new ArrayList<>();

        public QuizDataSet() {
                questions.add("What is the State Capital of California?");
                questions.add("What is the capital city of New York");
                questions.add("Which state is the Niagara Falls located in?");

                answers.add("Sacramento");
                answers.add("New York City");
                answers.add("New York");
        }

        public String getQuestion(int idx) {
                return questions.get(idx);
        }

        public String getAnswer(int idx) {
                return answers.get(idx);
        }

        public int getSize() {
                return questions.size();
        }
}
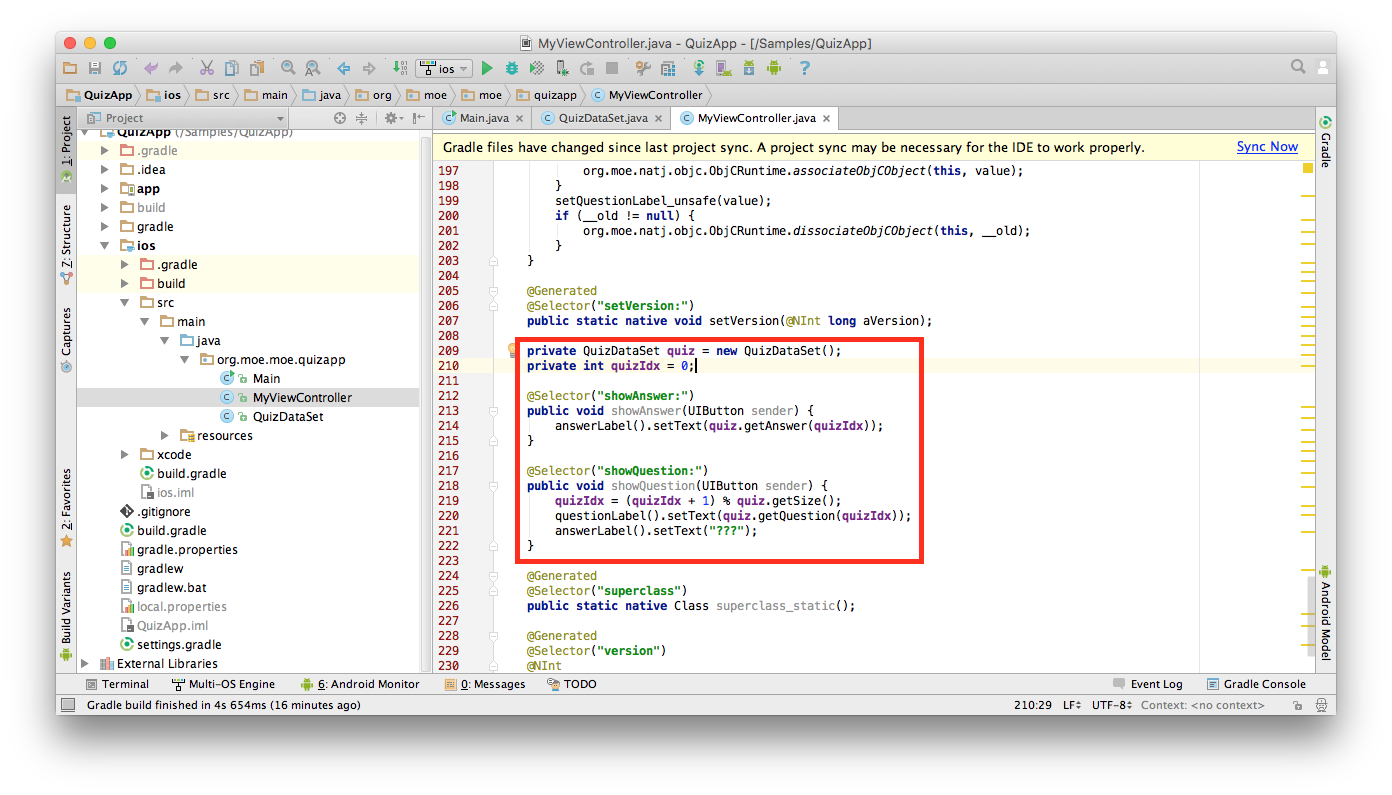
Open up your MyViewController class for editing. You should see the two actions “showQuestion” and “showAnswer”.

Remove the @Generated annotation and the native keyword. Change the code to the following:
private QuizDataSet quiz = new QuizDataSet();
private int quizIdx = 0;

@Selector("showAnswer:")
public void showAnswer(UIButton sender) {
        answerLabel().setText(quiz.getAnswer(quizIdx));
}

@Selector("showQuestion:")
public void showQuestion(UIButton sender) {
        quizIdx = (quizIdx + 1) % quiz.getSize();
        questionLabel().setText(quiz.getQuestion(quizIdx));
        answerLabel().setText("???");
}
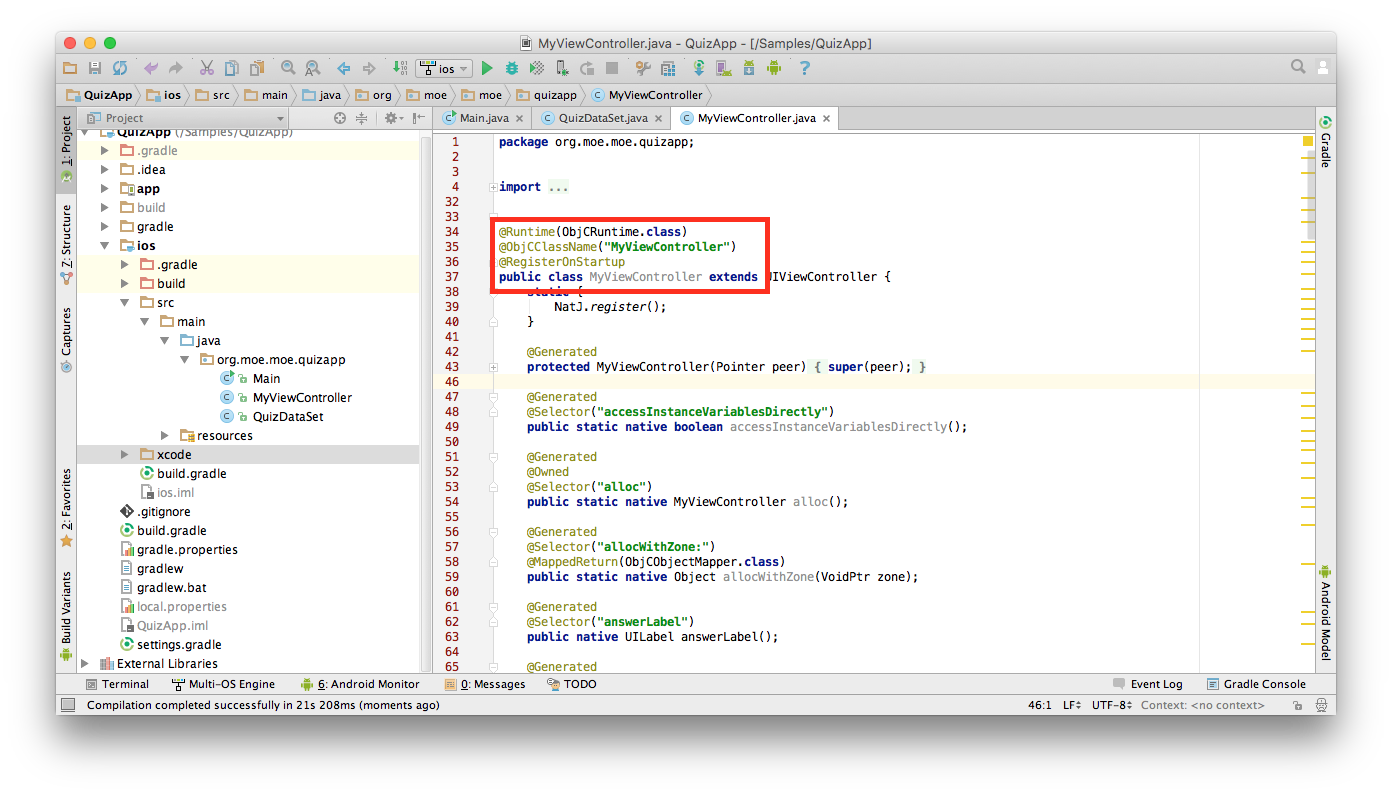
Go to the top of the file and change the annotations as follows: